การแชร์ปริ้นเตอร์ เป็นการแบ่งทรัพยากรเพื่อใช้งานร่วมกันกับคอมพิวเตอร์ (Computer) ในระบบเครือข่าย (Network) เดียวกัน โดยมีเครื่องหลักเป็นศูนย์กลางในการเปิดแชร์เครื่องปริ้นเตอร์ให้คอมพิวเตอร์เครื่องอื่นที่อยู่ในเครือเดียวกันสามารถใช้งานได้ร่วมกัน โดยสามารถนำไปใช้ได้ทั้ง Windows 7 / Windows 8.1 / Windows 10
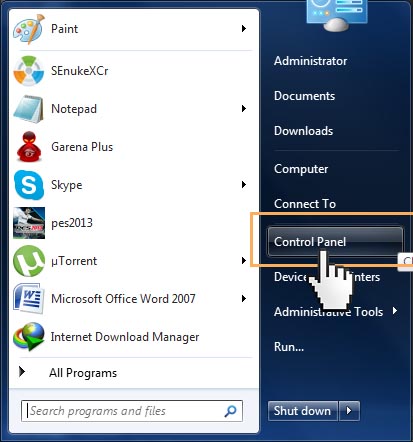
1.Start > Control Panel
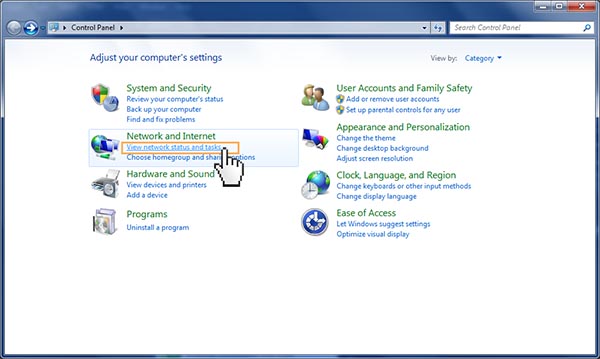
2.คลิกเลือก view network status and task bar
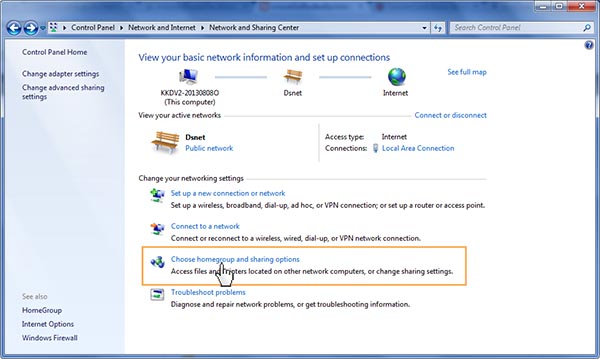
3.คลิกเลือก Choose Home Group and Sharing Option
4.คลิกเลือก Change Advanced and Sharing Setting

5.คลิกเลือก Public
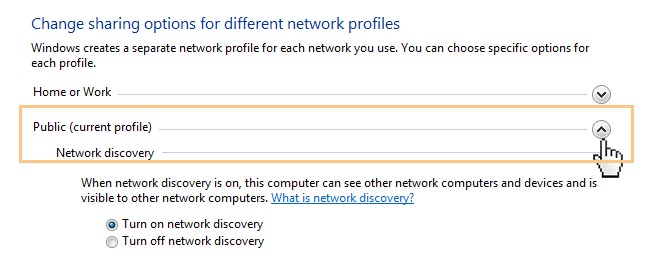
6.ติกเลือกที่ Turn on Network Discovery

7.ติกเลือกที่ Turn on file and printer sharing

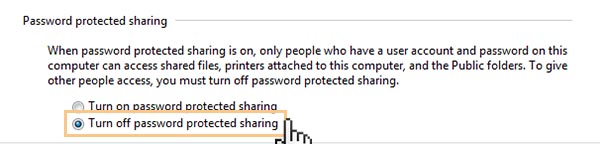
8.ติกเลือกที่ Turn off password protected sharing
9.กลับไปที่ Start > Control Panel > View Device and Printer

10.คลิกขวา printer ที่ต้องการแชร์ > Printer Properties > เลือก printer
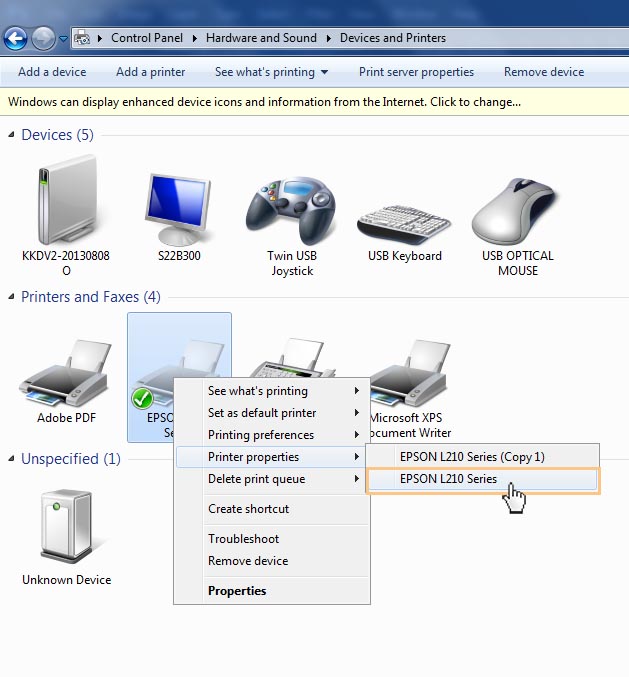
11.เลื่อกที่ Tab Sharing > คลิกเลือก Sharing This Printer > Apply

หลังจากนั้นก็จะไปตั้งค่าที่เครื่องลูกต่อ
Windows 7ตั้งค่าลูกเครื่อง
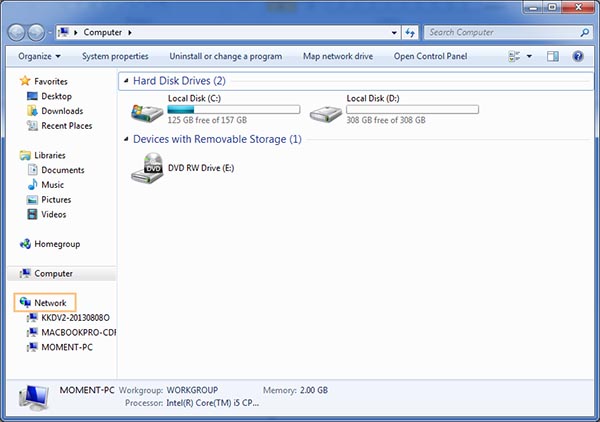
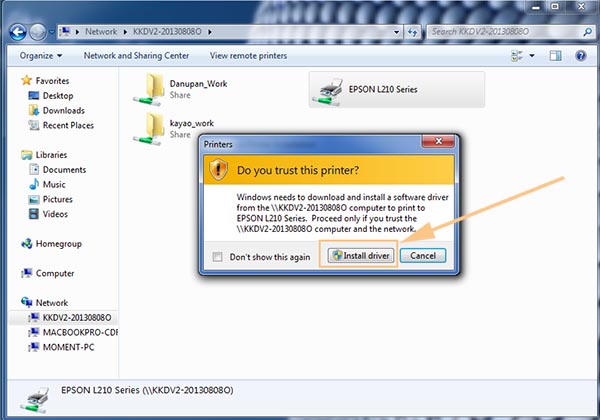
12.เข้าไปที่ My Computer > Network > เลือกชื่อเครื่องคอมพิวเตอร์ที่ share printer
13.จะเห็น icon printer ให้ทำการ Double click เพื่อทำการ Install Driver
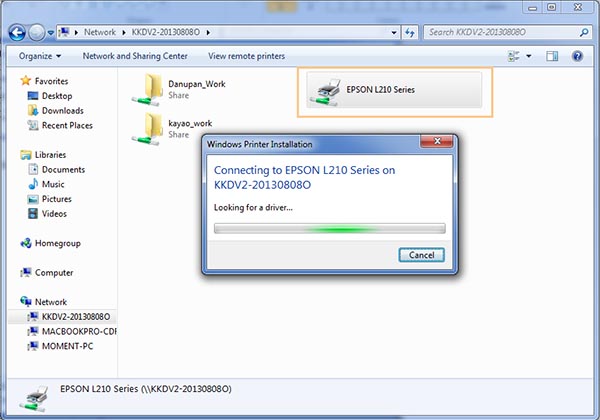
14.คลิก Install Driver
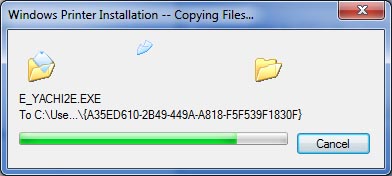
15.รอ process การ install driver printer
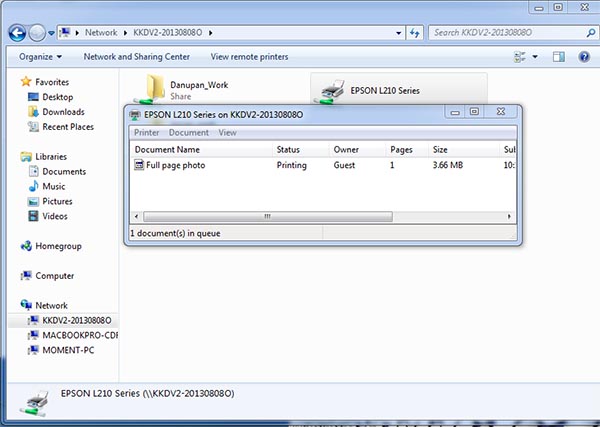
16.เท่านี้ก็สำเร็จ แล้วก็ทำการ ทดสอบปริ้นจากเครื่องลูก
ไม่มีความคิดเห็น:
แสดงความคิดเห็น